How to Connect Google Nest to WiFi

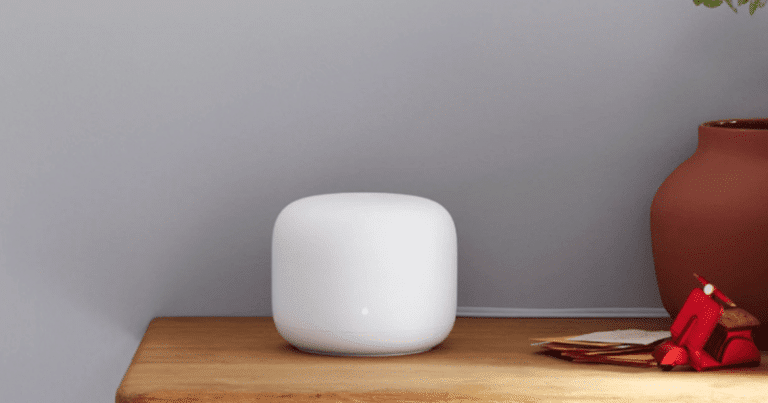
Google Nest is one of the most popular line of smart home devices that can control your home’s temperature, lighting, and security, among other things. If you recently purchased a Google Nest device, you may be wondering how to connect it to WiFi. Here’s a step-by-step guide to help you with the process:
If you’re having trouble connecting your Google Nest device to WiFi, don’t worry – you’re not alone. With a few simple steps, you can get your device connected and start enjoying all of its features.
In this article, we’ll guide you through the process of connecting your Google Nest device to WiFi, so you can start taking advantage of all the benefits of your smart home assistant.
Table of Contents
Why won’t my Google Home or Nest connect to the Wi-Fi?

If you’re having trouble connecting your Google Nest Wi-Fi to your network, you don’t have to worry. Unfortunately, there’s no clear solution to it. Sometimes, you have to troubleshoot by trying different methods.
It could be that your internet password got changed, your connection is slow, or your router signal is weak. Maybe your Google Home app needs an update.
But if all else fails, here are the possible reasons why your Google Nest won’t connect to the WiFi. We also included some tips on how to get your Google Nest up and running, so let’s go!
Your Google Home App is outdated.
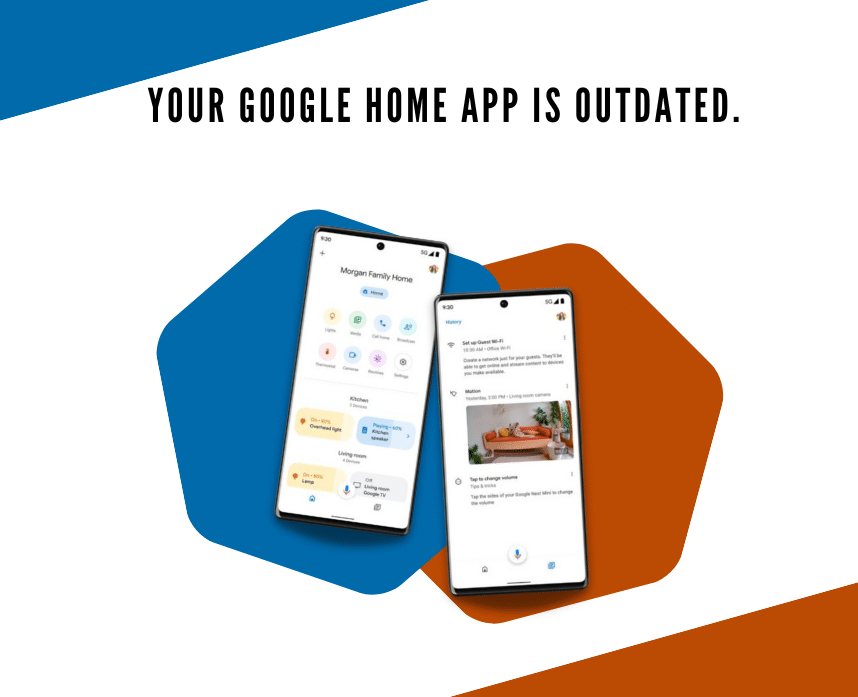
The Google Home app is a critical component of the Google Nest system. It is used to set up, manage, and control the device. However, if the app is outdated, it may not be compatible with the latest firmware, which could prevent the device from connecting to WiFi.
To fix this issue, you need to ensure that your Google Home app is up to date. Here are the steps to take:
For Android users:
Step 1: Open the Google Play Store on your mobile device.
Step 2: Search for the Google Home app.
Step 3: If an update is available, click on the Update button and wait for the app to update.
Step 4: Once the update is complete, open the app and try to connect your Nest to WiFi again.
For iOS users:
Step 1: Open the App Store on your mobile device.
Step 2: Search for the Google Home app.
Step 3: If an update is available, click on the update button and wait for the app to update.
Step 4: Once the update is complete, open the app and try to connect your Nest to WiFi again.
By following these steps, you should be able to fix the issue and enjoy uninterrupted connectivity. But, if the update does not solve the issue, you may try the next one.
You recently changed your password.
Changing your WiFi password can cause connectivity issues with your Google Nest device, but these can be resolved with a few easy steps.
To get your Google Home device working again, just head into the Google Home app. If you changed your Wi-Fi password, you’ll need to disconnect the device first. This will reset your connection and let you connect your internet with the new password.
Here are the steps you can follow to disconnect from the WiFi network:
Step 1: Open the Google Home app on your mobile device.
Step 2: Choose the WiFi network that you to reconnect to.
Step 3: Tap the Gear icon or i icon.
Step 4: Tap “Forget network.“
Step 5: A prompt will appear asking you to confirm your choice. Tap Remove.
Once you’ve successfully removed the network from your device, reconnect using the new password. Here’s how you can do it:
Step 1: Return to your dashboard and tap + to set up a new device.
Step 2: Follow the directions on your Google Home app on how to set up the device.
Step 3: Type your WiFi network’s new password.
Your Google Home or Nest has a poor connection with your router.
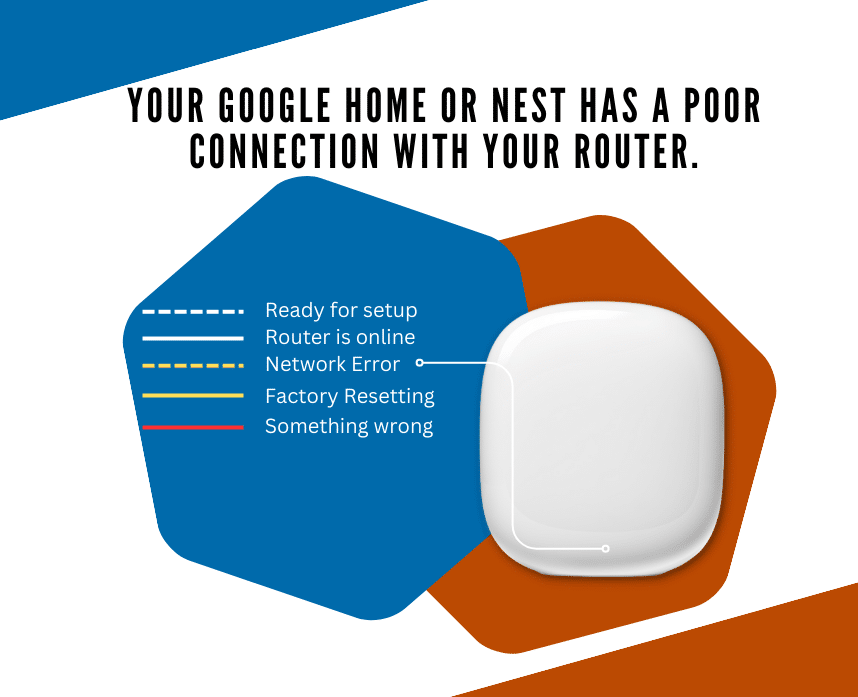
The first thing to check is whether your router is working correctly. If it’s not, then you’ll need to fix that first.
- Ensure that your router is plugged in and turned on.
- Check to see if the lights on the router are blinking, which indicates that it’s working correctly.
- If the lights are off, try resetting the router by unplugging it, waiting a few seconds, and plugging it back in.
If your router is working correctly but your Google Nest still won’t connect to the wifi, the next step is to check the signal strength. You can do this by conducting a speed test on your smartphone or tablet.
Walk around your house and look for areas where the signal is weak. These are often areas with many walls, floors, or other obstacles.
Once you’ve identified the weak zones, try moving your Google Nest unit closer to the router. This will ensure that the signal is strong enough to establish a connection.
If you’ve tried all of these steps and your Google Nest still won’t connect to the wifi, it might be time to try the next step.
Reduce the number of devices connected to your network.

Wireless routers are designed to manage a specific number of wireless WiFi devices. If you exceed that number, your router will struggle to manage the additional load, which can cause connectivity issues for all your devices.
The more devices you have connected to your network, the more traffic it generates, and the slower the internet speed becomes. This is called network congestion, and it can cause connectivity issues, especially for devices that require a stable and fast internet connection, like Google Nest.
When the network is congested, your Google Nest may struggle to connect to the network or may even disconnect or fail to function altogether.
One solution to resolve network congestion is to reduce the number of devices connected to your network. Here are some methods you can do:
- Check the devices connected to your network. Log in to your router’s admin page and check the list of connected devices. Identify which devices are necessary and which are not.
- Disconnect unnecessary devices. Once you’ve identified which devices are not essential, disconnect them from your network. This can be done by either turning off the device or forgetting the network on the device’s Wi-Fi settings.
- Consider upgrading your router. If you have a lot of devices connected to your network and reducing them is not practical, consider upgrading your router to a faster and more robust one that can accommodate more devices.
- Prioritize your smart home devices. You can do this by setting up Quality of Service (QoS) settings on your router, which will give priority to your smart home devices and allow them to connect more easily than other devices.
Restart your router.
Restarting your Wi-Fi router is an essential step to re-establishing a stable connection between your router and Google Nest. Here are the steps you can do to restart your router:
Step 1: Turn off your Wi-Fi router.
The first step to restarting your Wi-Fi is to turn it off. To do this, locate the power button on your router and press it. Wait for a few seconds for it to shut down completely.
Step 2: Unplug the Power Supply.
After turning off your Wi-Fi router, unplug the power supply. This helps to ensure that there is no residual power remaining in the router.
Step 3: Wait for a Few Seconds.
After unplugging the power supply, wait for a few seconds before plugging it back in. This allows time for the power supply to reset completely. This process might take some time, depending on your router model.
Step 4: Plug Your Wi-Fi Router Back In.
Once you’ve waited for an adequate amount of time, plug back in your Wi-Fi router. It’s essential to make sure that the power supply is firmly connected to the router.
Step 5: Wait for the Router to Restart.
After plugging in the power supply, wait for a few seconds to allow your router to restart. It’s essential to make sure all the lights on your router are functioning correctly before connecting your Google Nest to your Wi-Fi network.
Step 6: Connect your Google Nest to Wi-Fi.
Once your router is fully restarted, connect your Google Nest to your Wi-Fi network as you normally would. This time, it should connect effortlessly to your Wi-Fi network.
Restart your Google Home and Nest via the Google Home App.
Restarting your Google Nest or Google Home via the Google Home app is an easy and effective way to fix connectivity problems. By following the simple steps below, you can ensure that your device is working correctly and providing you with the convenience and efficiency you desire.
Step 1: Open the Google Home App
To restart your Google Nest and Google Home, you need to first open the Google Home app on your smartphone or tablet.
Step 2: Select Your Device
Once you’ve opened the app, select the device you want to restart. Tap on the device to access the settings.
Step 3: Tap Settings
In the top right-hand corner of the screen, you’ll see three dots; tap on them to access the settings menu.
Step 4: Restart Your Device
In the settings menu, you’ll see an option that says ‘Restart Device’. Tap on it, and your Google Nest or Google Home will start the restart process. Please note that the device will turn off, and it will take a few minutes to restart.
Step 5: Reconnect to Wi-Fi
After the device has restarted, you’ll need to reconnect it to your Wi-Fi network. You can do this by selecting the device in the Google Home app, tapping on the three dots in the corner, and selecting ‘Wi-Fi’. Follow the instructions to connect your device to your Wi-Fi network.
Step 6: Test the Connection
Once you’ve reconnected to the Wi-Fi network, test the connection by asking your Google Nest or Google Home to perform a task, such as playing music, controlling the temperature, or turning off the lights. If everything is working correctly, then you should have no issues.
The Bottom Line
Connecting your Google Nest to WiFi is an easy process that can be done in just a few steps. Hopefully, the steps above helped you fix your Google Nest issues.
However, if none of these troubleshooting steps worked, you may contact Google support for further help.
If your router is the culprit, you’ll need a new one. Be sure to buy one of the best routers compatible with Google Fiber.
Related Articles: